Are you making the best use of the searching, sorting and filtering tools at your DNA testing company?
Or are your matches in a big mess?
For those using spreadsheets or other third party tools, you may be happy downloading matches and using your own toolsets to sort and filter, but there is a lot you can do on the websites themselves.
Here is a run down of some of the searching and filtering options I use and where to find them.
Ancestry
At Ancestry on the home page there are many different ways to filter or sort your matches. In the picture there are 9 different options – lets run through them.
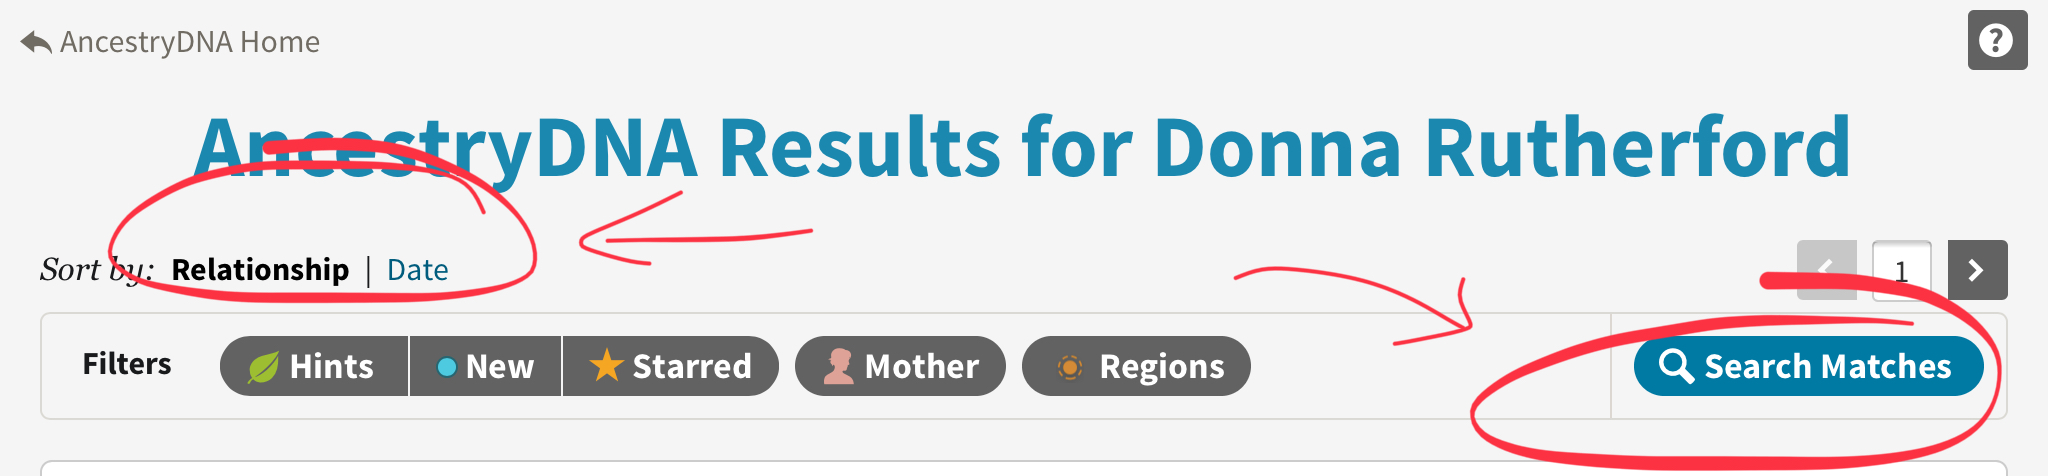
1. Sorting by Relationship – this is the default sorting, your highest matches will be at the top. They are categorised into a predicted relationship – but remember this is a just a possibility – more research is required to find the correct relationship. Within each category the list is sorted by the amount of cM you share with someone. (You can find the cM by clicking the little “i” icon on the match page).
2. Sorting by Date – click on the “Date” link (next to “Relationship”) and now all your matches will be in the order they were added to your match list. They are no longer sorted by relationship, so you need to look through the list to see what the possible relationship is. I often skim through this to look for any new “interesting” matches.
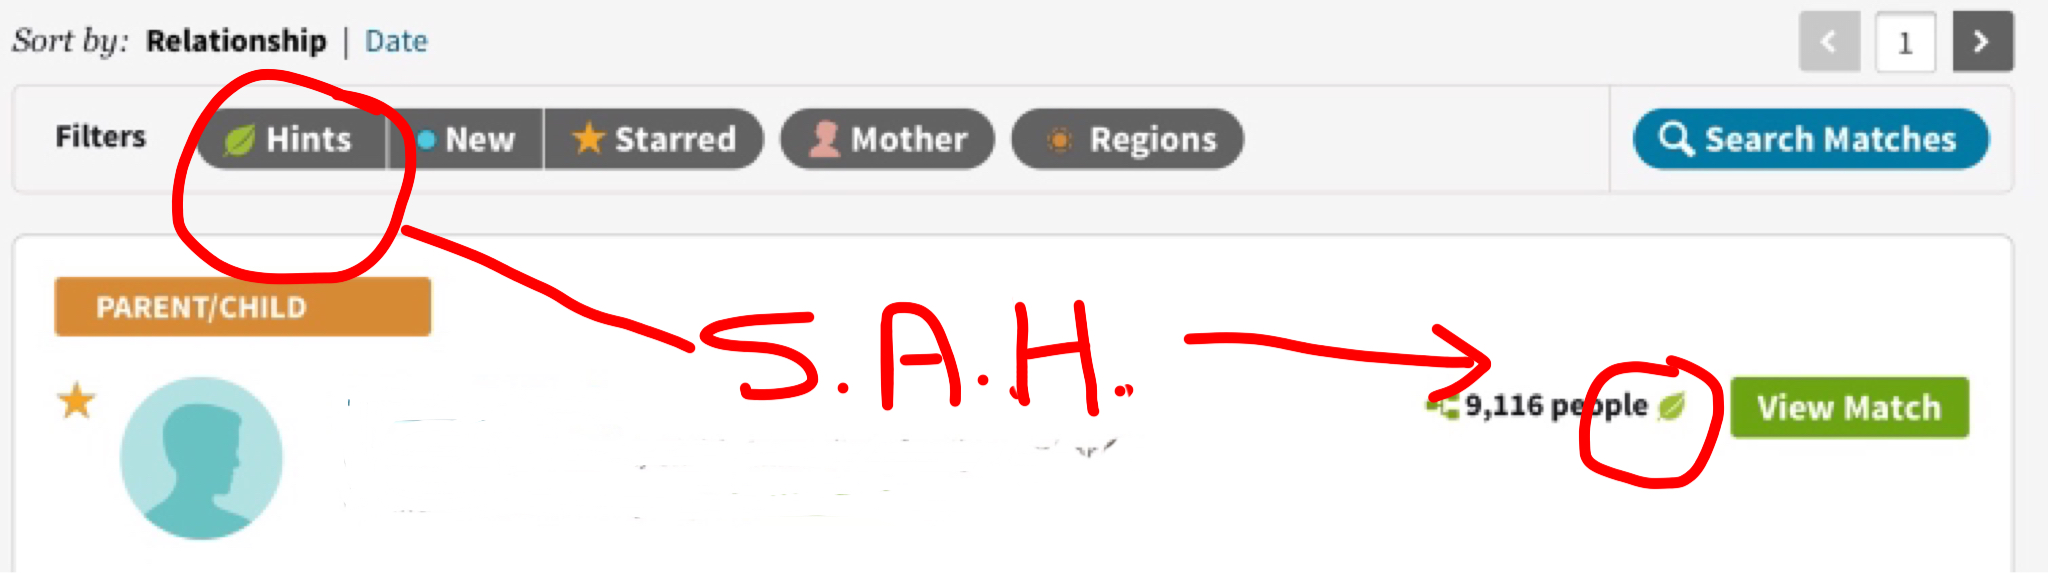
3. Filtering by Shared Ancestor Hints (SAH) – You can use this filter either on the Relationship or the Date sorting page. These are matches where the system has found a matching person in your tree and your matches trees. Be aware this is only a hint! You can also use this while in the date sorted page.
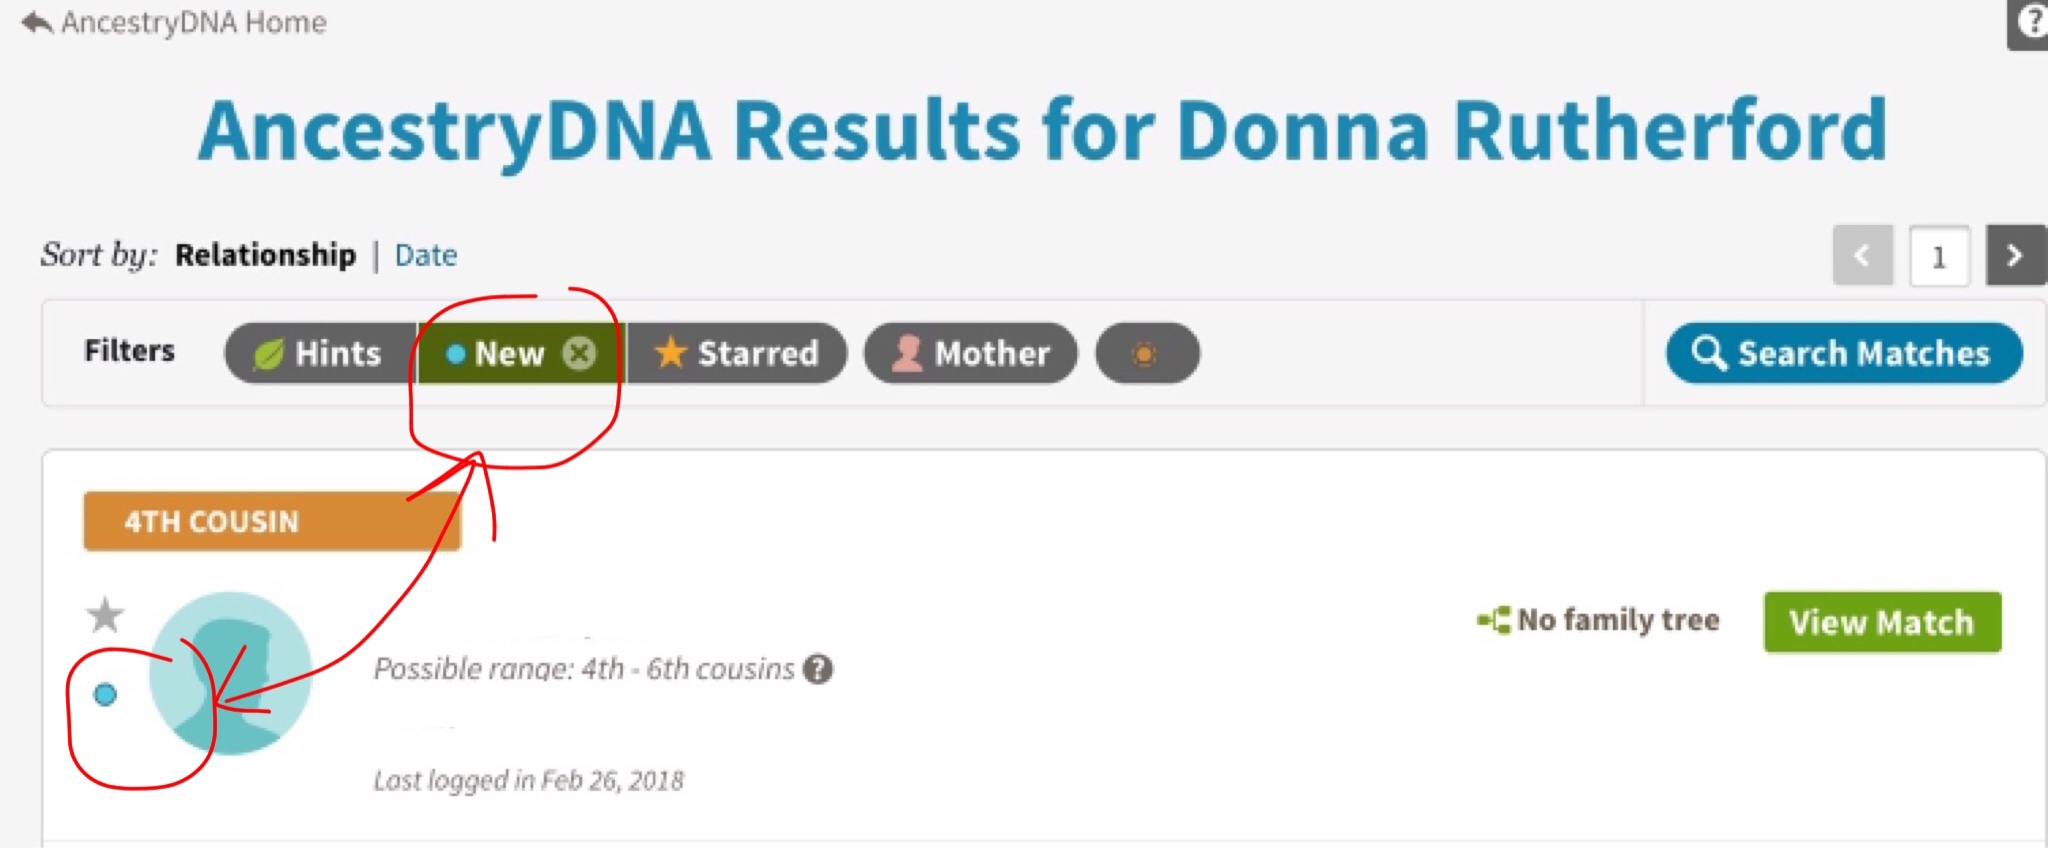
4. The Blue dot – this is a filter of matches where you have not yet opened up the match page, the blue dot turns grey when you view a match. Again it can be used on either the relationship sorted or the date sorted page. If you want a match to show again as “unread” (with a blue dot) – you can click it back to blue in the match page – and it will stay as unread until you open it again.
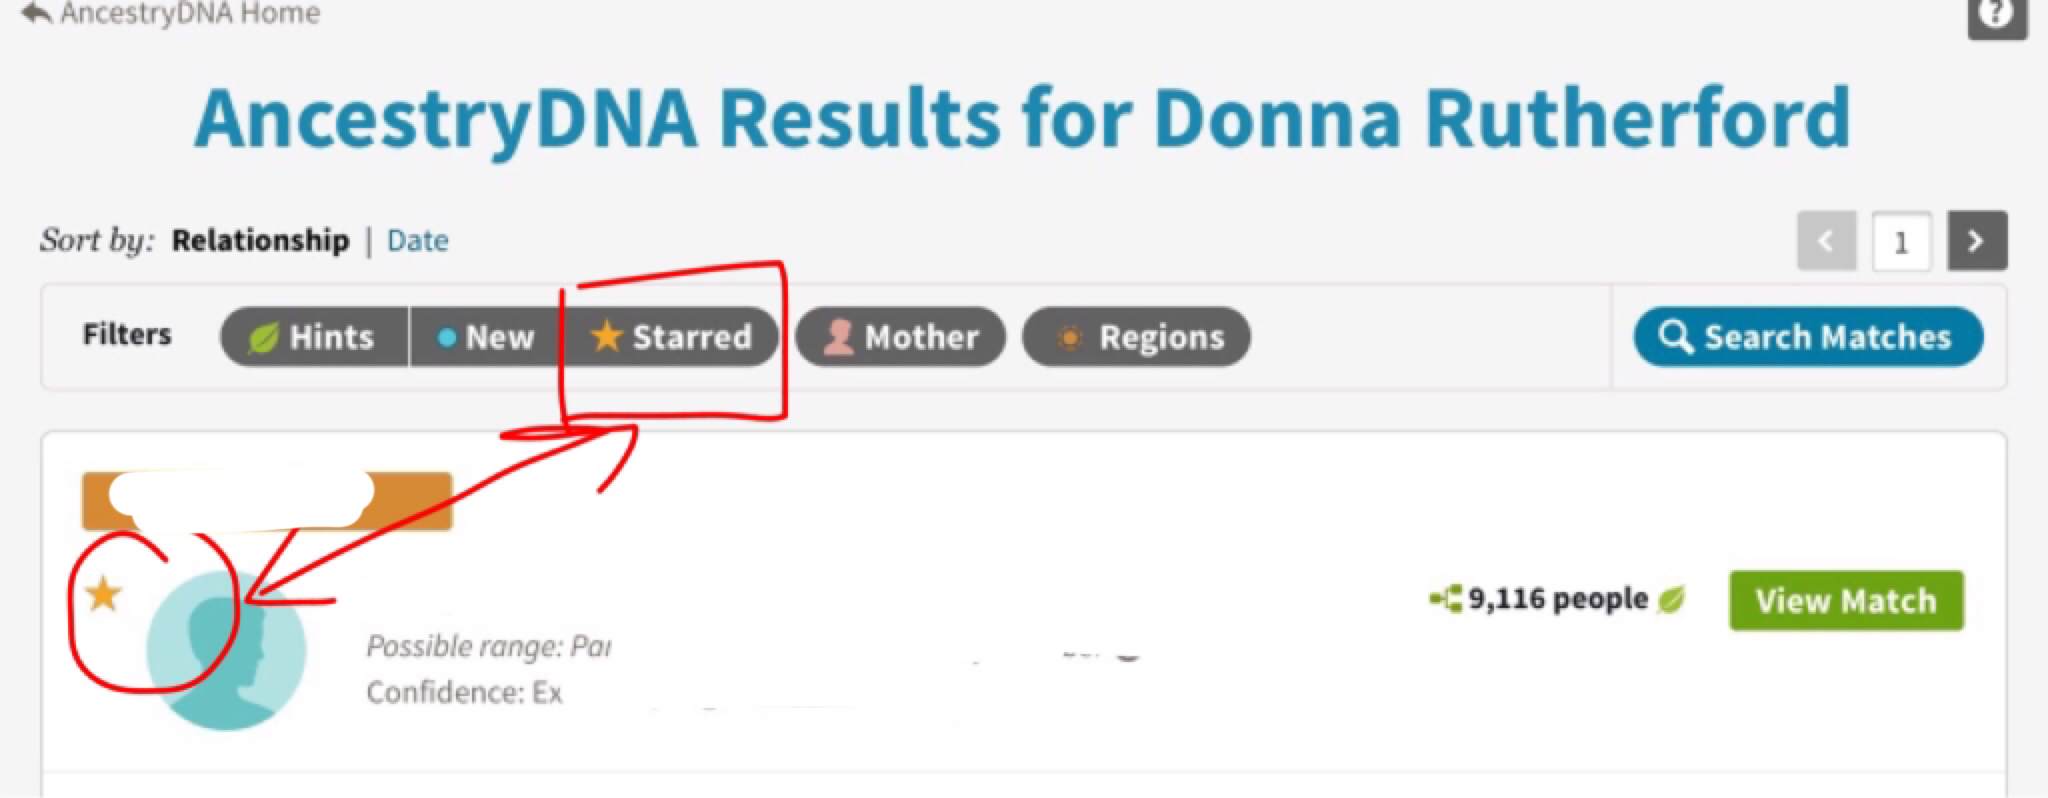
5. Starred – the stars can be added by you to any match you want. I use them to denote that I’ve confirmed a match and added them to my tree. Many users have requested coloured stars! Coloured stars would indeed be brilliant and I hope the Ancestry programmers find a way to do it. And like the other filters, you can filter in both the relationship sorted page and the date sorted page. You can choose to use this star in anyway you want. Clicking it switches it on, and clicking it again turns it off.
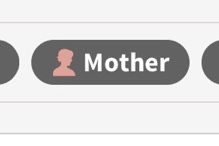
6. “Mother” button – If you have tested a parent, then you get an additional filter for each one. By clicking the button you will see only the matches that match with that parent. Once again it is available whether you are sorting by date or by relationship.

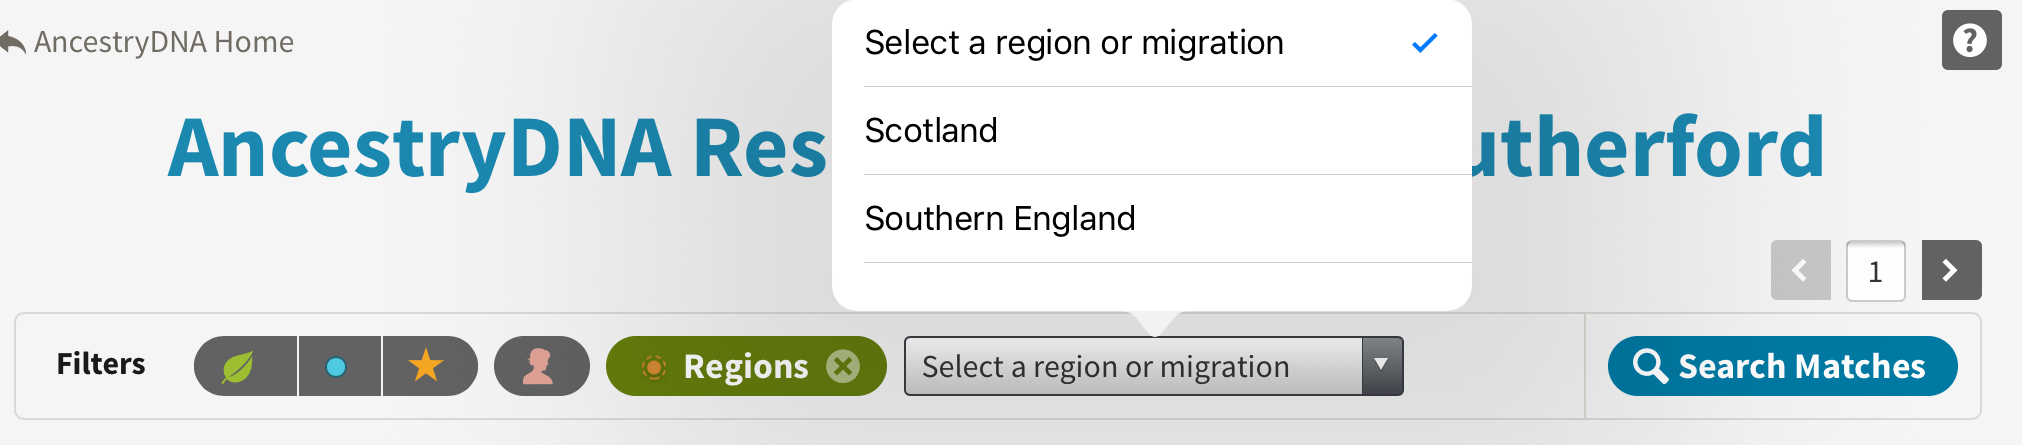
7. Regions/Migrations – there is another button available to you if you have been put into specific regions or migrations. Click the down arrow in the box and you’ll see the available choices. This can be really helpful if you are looking for, say, all of your Scotland matches – it will return all those matches that are also in Scotland as a sub-region. For some reason, this filter does not work when sorting by date – it will return matches only in relationship order.
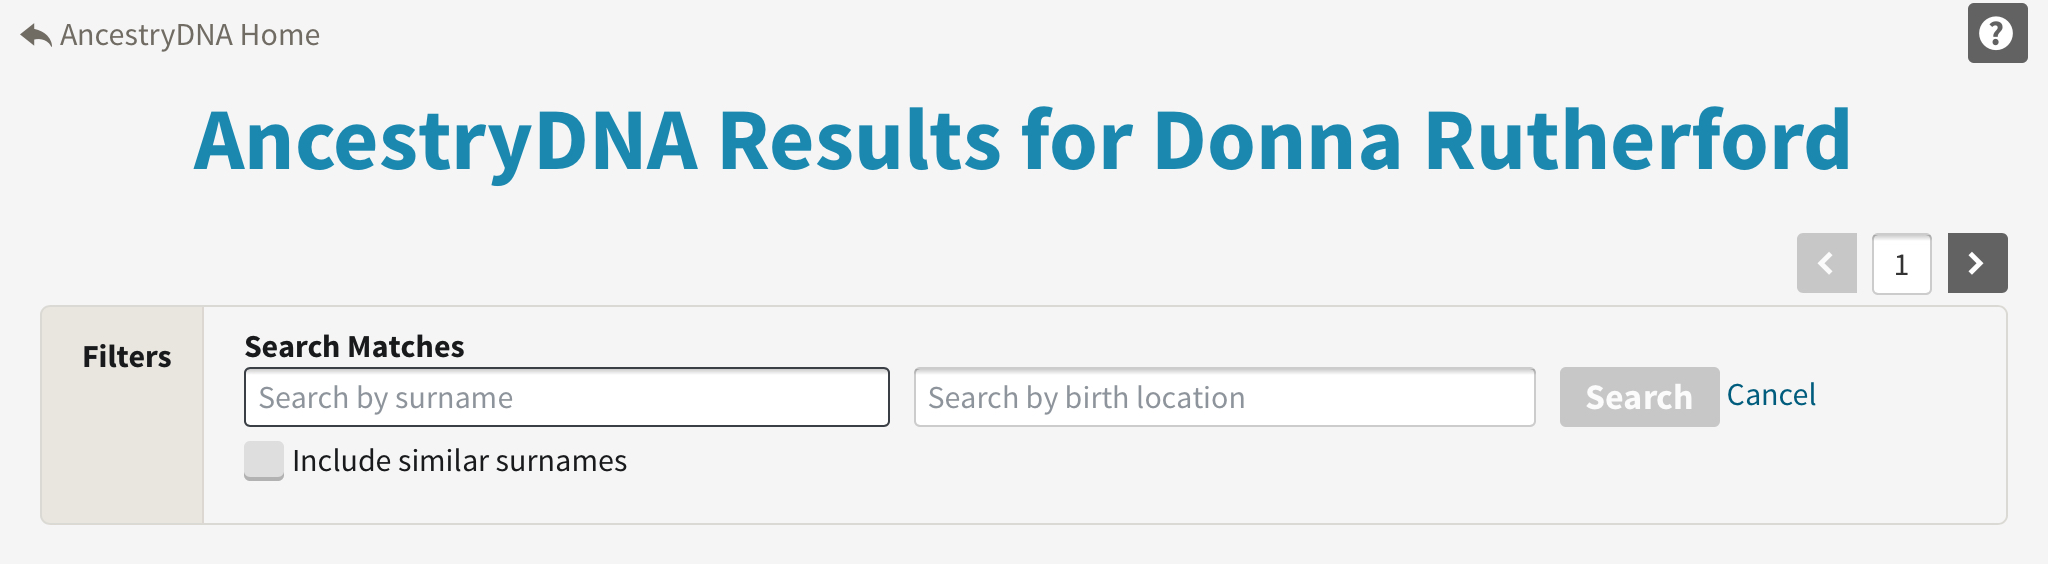
8. Over to the right of your page is a “Search Matches” button, this one opens up a whole new header on the page and gives you two more search fields. “Search by surname” and “Search by birth location”. Note that this search feature only returns matches that have their DNA attached to a tree! The surname field also lets you tick the box if you want “similar surnames”. Birth locations can be useful if you are looking for people who have a tree with descendants from a particular place. You can also use the two fields together, so a Surname from a particular location.
TIP: This function is also useful for working out who might be in a private tree, by searching for all your known names, you can note down which name will get the private tree match returned. Very helpful!
9. The final search on your main DNA matches page is the page number. If you want to see who is on page 100 for example, you can just type 100 into the page field and it will take you there. This works on both the page sorted by relationship and the page sorted by date (so if you are looking back for a match that you got two months ago – you can skip ahead a few pages by typing in a page number).
I’ve read recently that Ancestry have had a few glitches with their search functions – they have mostly been working well for me. It is, however, definitely worth remembering that Surname and Location searches will ONLY return matches that have linked trees (not those with unlinked trees, or no trees).
More filters on the match page – open up a match

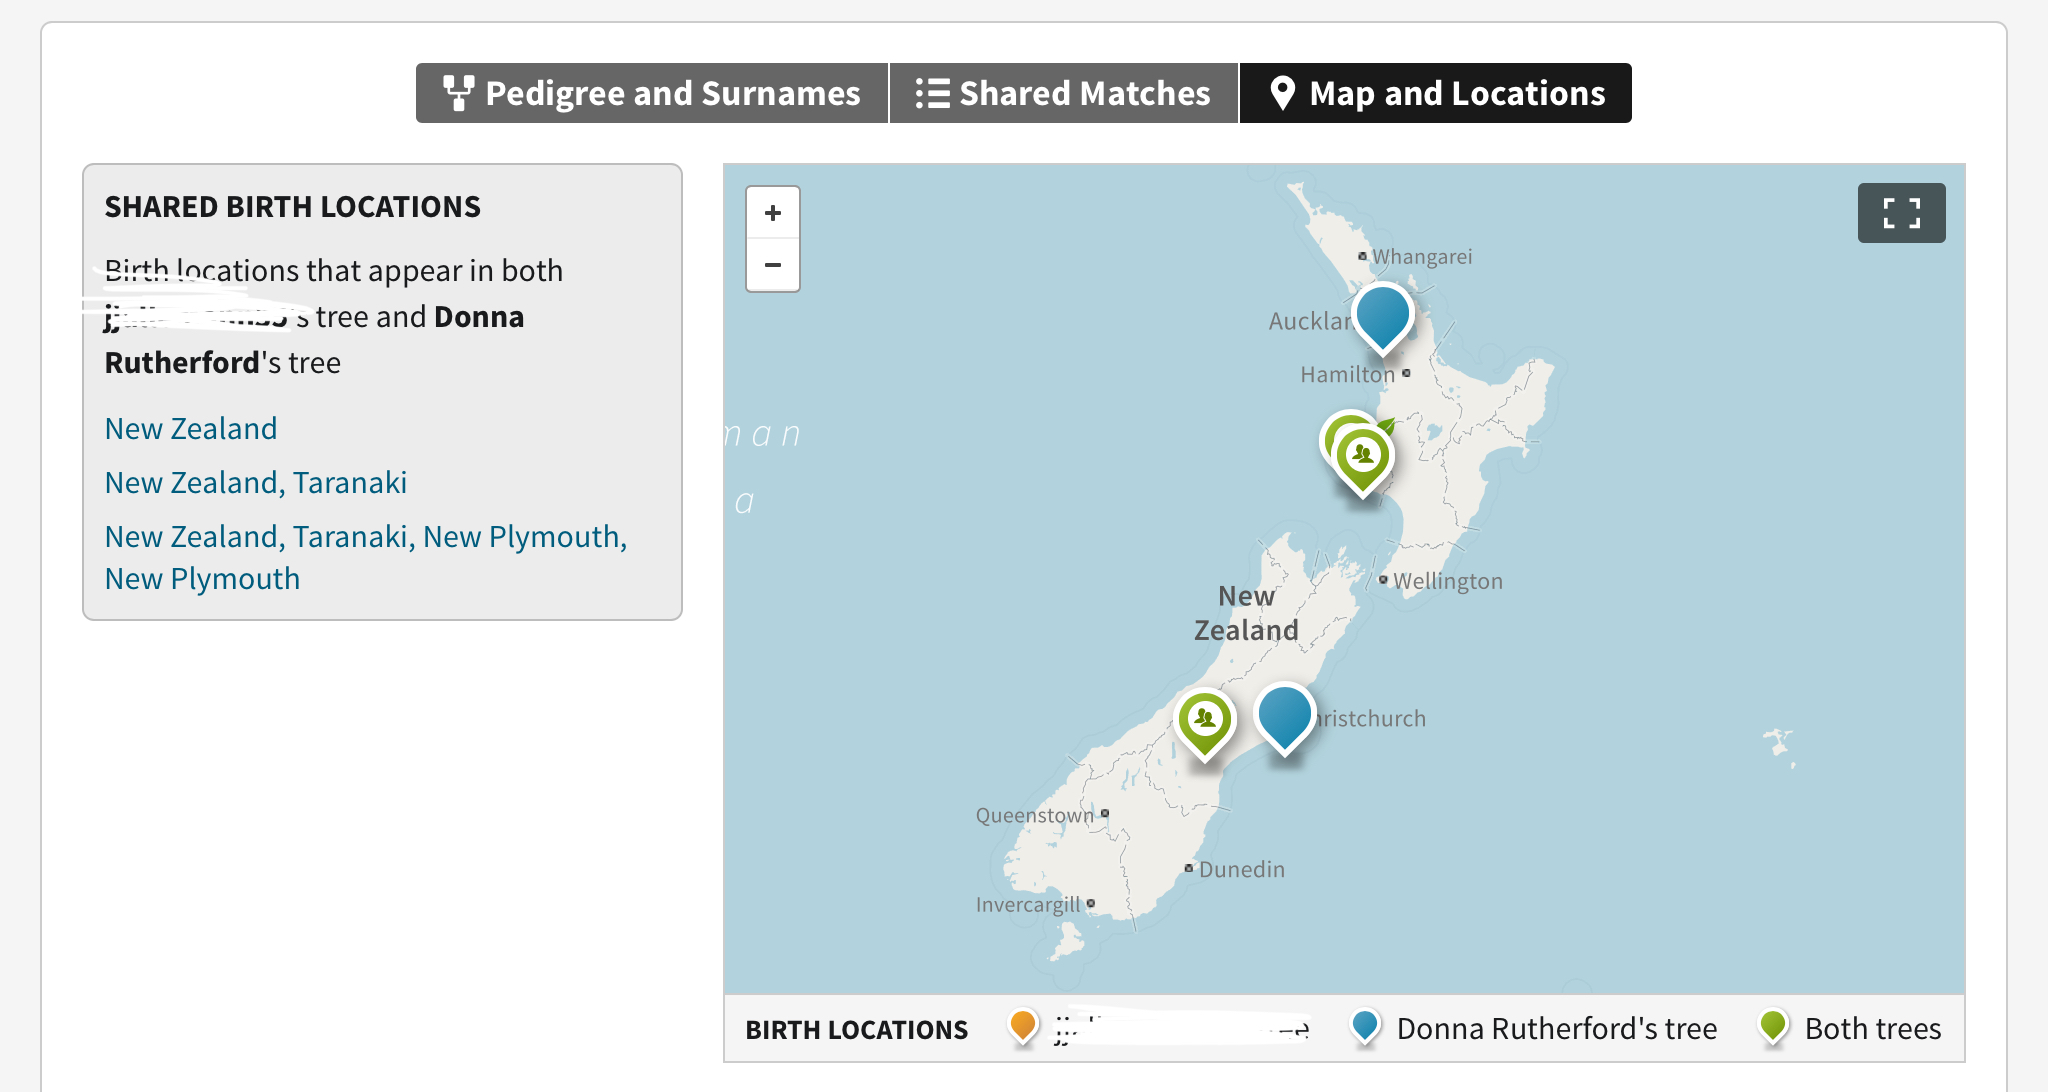
1. The default match page will show the tree (Pedigree and Surnames) and if the match has not linked their DNA to a tree, then there will be a drop down box of any available trees they do have. Note that if you select an unlinked tree, then while it is selected you can also use the Map and Locations button for that tree.
2. Shared Matches – one of the most useful and powerful tools – by clicking this button you can find all the other 4th cousins and closer that this match shares with you. Sometimes I can immediately work out who a match is just by who they also share! Bear in mind that only 4th cousins and closer are returned with the Shared Matches button
3. Maps and Locations – this can be a useful pictorial filter to look for locations that you share. Bear in mind the location is only as good as the location listed in your tree and your matches trees. The coloured pins help you find locations in common (they will be Green). Clicking the pin will list all your ancestors with those locations listed in their birth field. If you click the location names to the left of the box, you get a nice side by side table of your matches tree names and your trees names born in that location.
More about managing ancestry DNA matches here
https://support.ancestry.co.uk/s/article/UK-AncestryDNA-Matches
———————————————————————
ftDNA – Family Tree DNA
1. At ftDNA the default sort is by “Longest Block” – this is the biggest segment you share with a match. This is not necessarily in order of closeness of the match and you might see “3rd cousin – 5th cousin” higher in the list than “2nd cousin – 4th cousin”.
2. Above the matches is a row with several sort functions – clicking them will re-sort your whole match list into a new order.
- Name (Alphabetical)
- Match Date – click it once to see the most recent at the top, click it again to see it in order of oldest on to
- Relationship Range – I use this one the most – as it will re-sort the list into closest relationship first (or click again to see the most distant first).
- Shared Centimorgans – sorts by the amount of shared cM – bear in mind that ftDNA count all tiny segments of shared DNA once a match is established – so you will see higher amounts here than on other test sites.
- Longest Block (the default sort)
- The last column is Ancestral surnames – this is not a sorting field. These are names from the trees of your ancestors – note that if you have a shared name in your trees, then that surname will be in bold letters and appear first.
3. Back at the top of the match page you can page forward or back, or enter in a page number you want to go to.
4. There are several more detailed searches and filters here at the top of the page
- On the left is a blank box – but if you click the little down arrow you’ll get access to many different filters for your match list – Surname, X Match, Close Relatives, and also one called “new since”. If you click “new since” you will get another blank field where you can enter a calendar date. This will return all the matches since that date – this is excellent for finding the new matches.
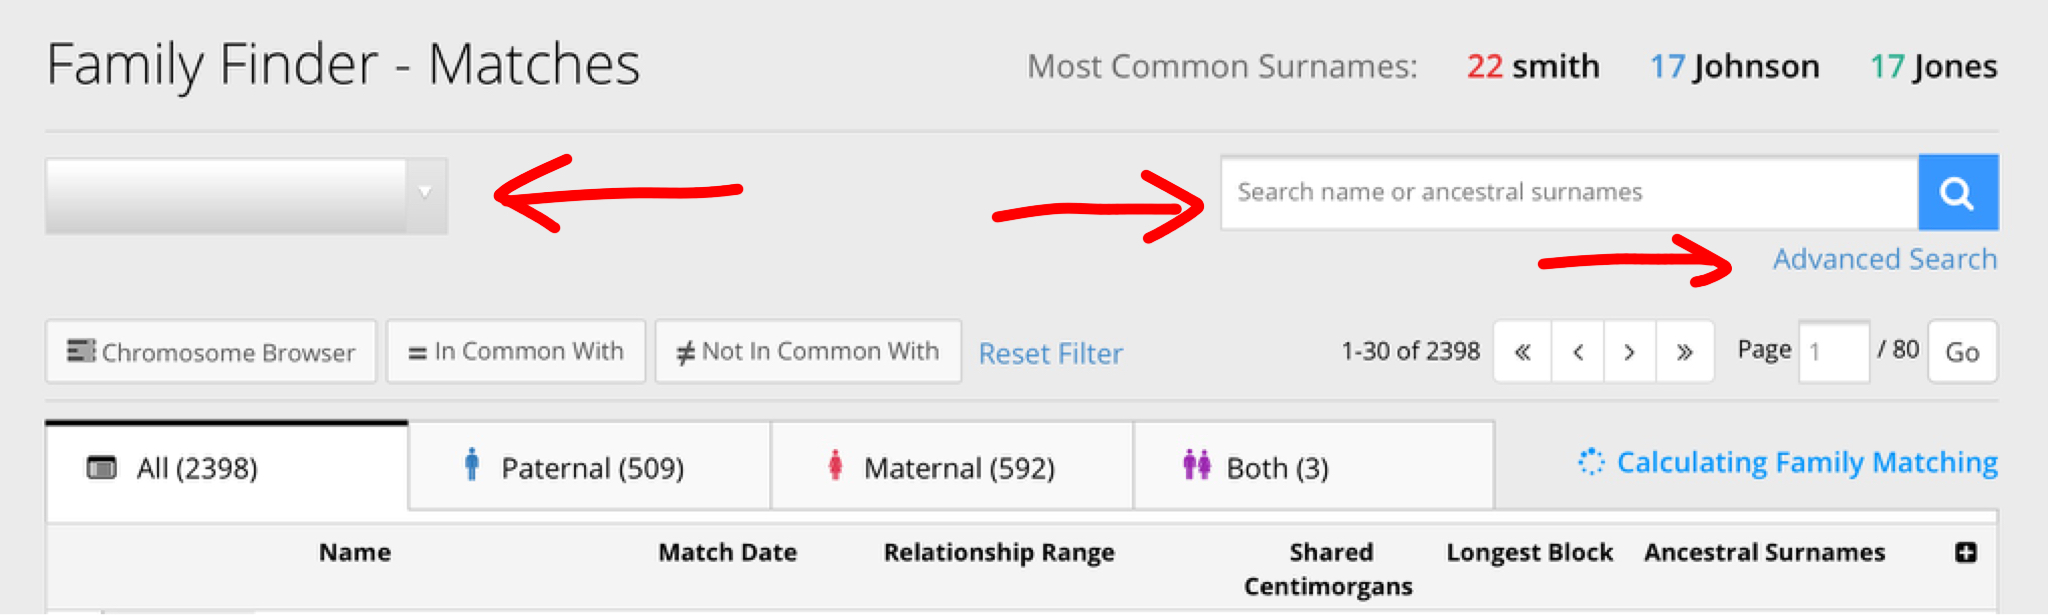
- Over on the right is a box for searching “name or ancestral surname”. This will return matches that have the name you enter, as well as searching their tree ancestors. Can be useful for finding a match quickly .. and of course looking for trees with a surname you are researching.
- Searching can be even more powerful if you click “Advanced Search” right underneath the box. Here two more boxes open up, one over on the left, and one on the right. You can now choose two names in your search (it will return matches that match one of the names or even both of the names. It search matches name and Ancestral surnames. If it finds a match in the Ancestral surnames, the name will be in blue. By using the other filter fields to the left you can narrow it down again – e.g. Close relatives, with an X Match that have Smith and Brown in their name or Ancestral names. Click Standard Search to return to the previous boxes.
- More filters! There are 3 more button filters that are even more powerful. Here you can choose a match and find other matches that they share (In Common With), but sometimes even more useful is choosing the “Not in Common With” button (which basically does what it says on the tin – it will return all the matches, that are not in common with the match you selected). You can only select 1 match at a time for this filter.
- To the left of of the ICW and Not ICW (In Common With) buttons is the Chromosome Browser button. Here you can choose up to 5 people and the page will change to a chromosome browser.
- Right above the column headings are 4 tabs – these tabs let you see which “bucket” your match is in. If you have linked at least one maternal and/or paternal match on to your tree – you will see your matches put into the maternal or paternal bucket based on their match to those linked people.
The user guide to get your tree ready for this, is here->
https://www.familytreedna.com/learn/user-guide/family-finder-myftdna/family-matching-tool/
5. Filters and Searches in Chromosome Browser View
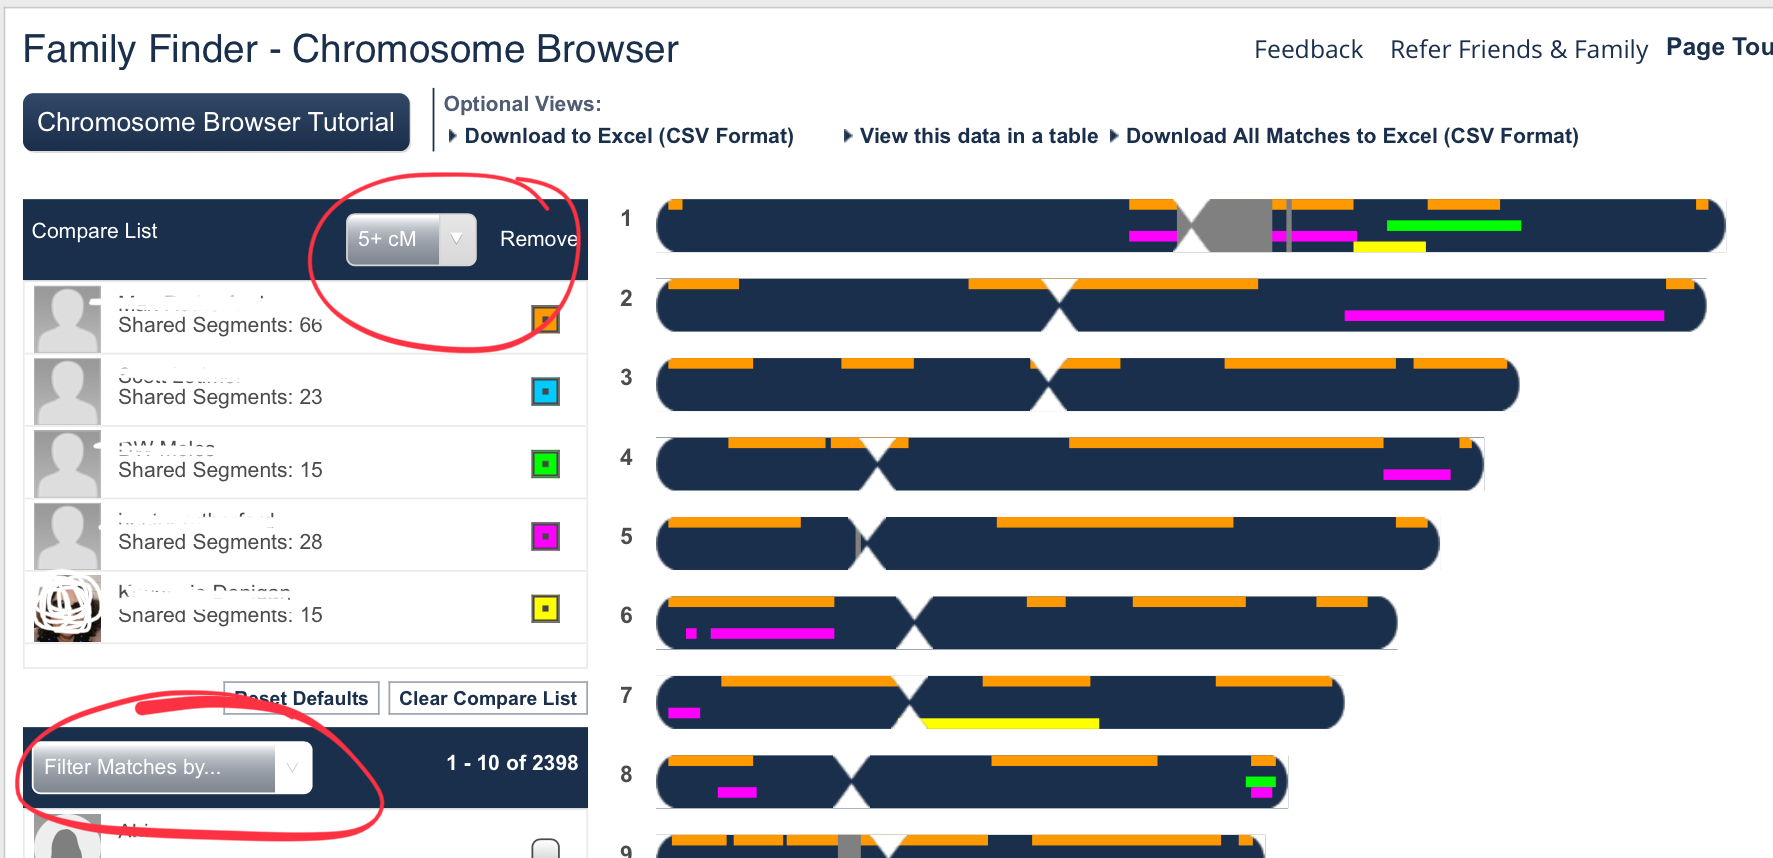
- In the Compare list are the 5 (or less) matches you chose to compare on the browser … note that the background of the browser (the dark blue) is you.
- You can move people in and out of this view without going back to the main page – simply look under the compare list and select people to add. If you already have 5 people in your compare list – click their coloured square and they will be removed, then add your new person.
- Note that the segments compared on the browser are segments >5cM – you can change this clicking on the down arrow for more options
- There are many more options on this page – viewing the data in a table, downloading all matches etc.
NOTE: If you are looking for the matrix view – it is back on the main dashboard page (under the Ancient Origins button).

———————————————————————
My Heritage

1. The default sort for matches at My Heritage is closest first as they are initially sorted by “Shared DNA”.
2. You can change the sort by clicking the little down arrow next to the “Sort by: Shared DNA” (middle of the page). The options are Shared DNA (default), Shared Segments, Largest Segment, Full name (alphabetical), Most recent (date of the match). “Most recent” makes finding new matches easy! Note that My Heritage also add a small box with NEW on your most recent matches.
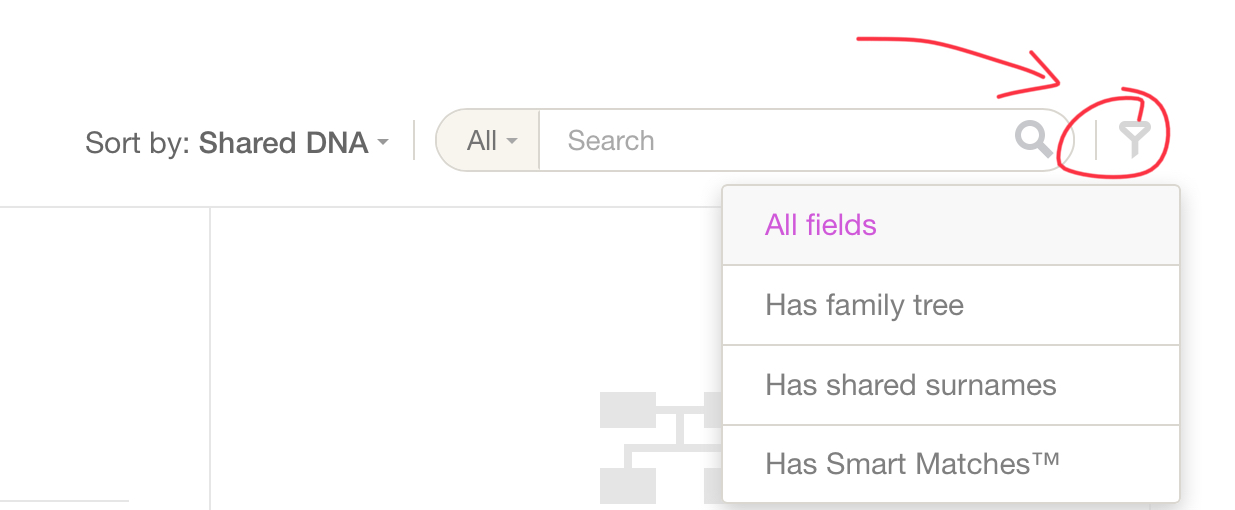
3. Next to the sort feature you also have a search button – Here you can choose All, Full Name, Country, Ancestor surnames. These are powerful searches that will help with your research. You can use the search along with the sort button, for example search for a Surname, and then sort by “Most recent”
4. To the right of the search field is a filter button. Here you can filter matches to find those that have a family tree, a shared surname, or has a smart match. Filtering for those with Smart matches can be extremely useful, as these matches already have tree matches with you. Remember to treat smart matches as a hint that you share a common ancestor – but always remember to check your matches research. If you are filtering your matches, check also what you have in the search box, as you can use these tools together.
- 5. When you click on a match (“Review Match” button) – you can find shared matches and triangulated matches, all from within the match page.
1. The Shared matches are listed down the page – your relationship on the left, and the matches relationship on the right.
2. If you have a triangulated match then there is a small button to the right to alert you. Click on this and you will see the segment that is triangulated (meaning that you and your match all match a third person)
My Heritage having been adding more and more functionality to their DNA pages over the past few weeks – so keep looking for updates.
My Heritage have been adding more and more functionality to their DNA pages the past few weeks – so keep looking for updates.
This link to their blog gives a lot more useful information https://blog.myheritage.com/2018/03/new-easier-navigation-in-your-dna-match-list/
———————————————————————
GEDMatch – One to Many
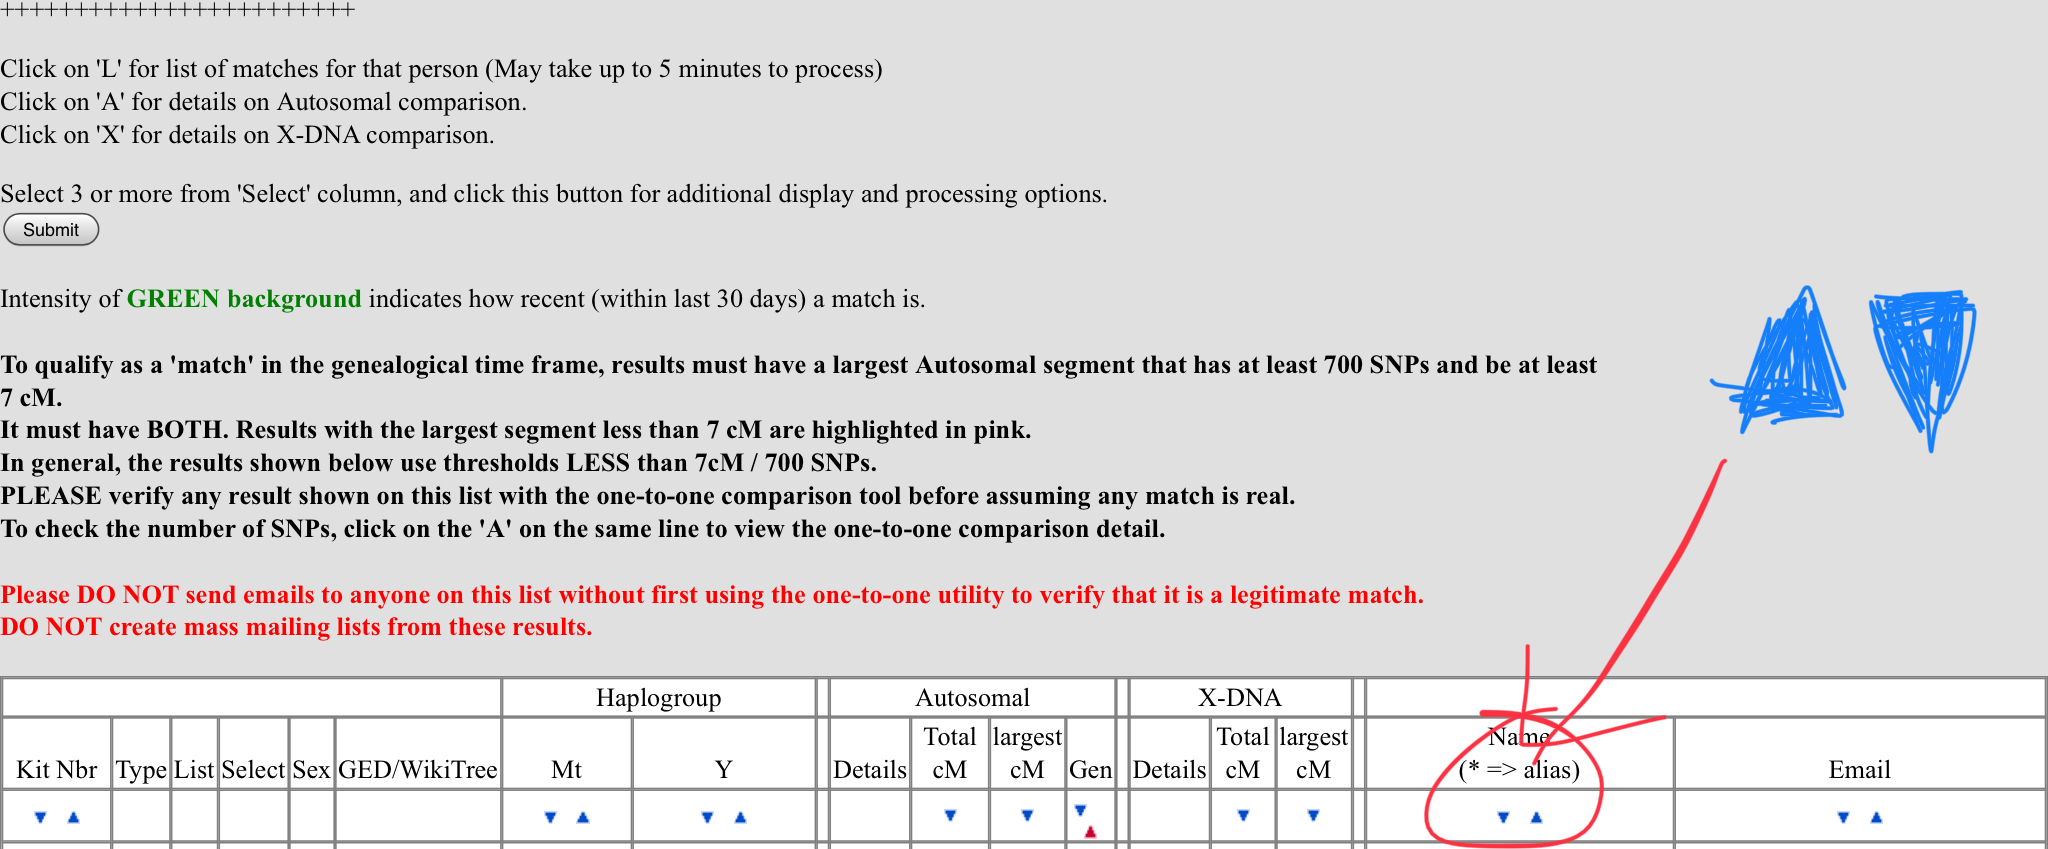
The GEDmatch one-to-many report has several filters. The report will return only 2000 matches, but you will have more than this in their database, so you can manipulate the sorting to find more matches beyond the 2000.
1. As you run the report you can choose the cM size. It is not sensible to reduce the 7cM, but it might be useful to increase the size to say 20cM, if you only want a list of your top matches. It will also make the report run faster!
2. At the top of the report are blue up and down arrows, by clicking these the page will re-sort ascending or descending.
3. Note that GEDMatch only returns 2000 matches, but if you choose a different sort option (say email address) it will re-run the report for the top 2000 matches starting at email addresses beginning with an “A”, or if you click the other arrow it will begin at “Z”. The 2000 matches will not be the same 2000 matches you saw when you ran the report. My list of 2000 in alphabetical order only goes from the A’s to the M’s. It can be useful to run these in the different orders if you are looking for particular email addresses for example.
4. Using your browser functions you can also look for a surname on this page. Use your browser “find on this page” and enter the surname you are looking for and the browser will highlight the names. This can be particularly useful to find specific email addresses for other countries like “.au” for Australia, or “.nz” for New Zealand email addresses (remember that those countries also use generic .com addresses).
5. Using the sort button for haplogroups can also be useful – again it will return a different set of 2000 matches and bear in mind they may be quite small matches.
Remember that at GEDMatch you can click on the links in the report to see a one-to-one match, or list the matches match list.
———————————————————————
As the DNA databases grow and our match lists grow, it really helps to be able to find your way around the sites to quickly find the matches that are going to help your research. It can be easy to get stuck looking at a match list and not quite knowing where to start – by using good searching, sorting and filtering techniques you may find the most useful matches quicker.
Happy hunting!
———————————————————————
if you are not a member of my DNA Facebook group, please come and join us.
https://www.facebook.com/groups/AncestryUKDNA/

